Miter joints. Time-consuming and challenging but so worth the effort. In my mind, they add a level of craftsmanship to cabinetry.
This short clip shows a collage of video and images in the creation of a long (83″) miter joint.
Custom cabinetry, woodworking and woodturning by Keith Larrett
Miter joints. Time-consuming and challenging but so worth the effort. In my mind, they add a level of craftsmanship to cabinetry.
This short clip shows a collage of video and images in the creation of a long (83″) miter joint.
These cabinets were built for a brand new home on the west coast of Florida, just north of Tampa. They were installed in the dining room. Constructed with a recomposed veneer from Italy called Hurricane Grey they complimented the existing dining table.
Dimmable LED lights in the side walls behind the face frames of the glass door cabinets will illuminate the contents of these cabinets despite the wooden shelves. The LED lights on the underside of the bridge cabinet will highlight an eventual display of wine bottles on wine pegs.
It took two trips to install this project. The first trip saw the installation of the base cabinets and the second trip saw the installation of the upper cabinets after the countertop had been installed.
This is the second of three projects done for this client. It’s been a real pleasure working with her and testimony as to what can be achieved over a long distance by email communication. Lots and lots of emails. I’m looking forward to collaborating on the third project later this year.


I did not build these laundry cabinets. I purchased them on behalf of my client from my friend Mike at Quality Cabinet Services.
I did install them, however. I don’t often get to see the finished room but my client was kind enough to send me these pictures. It was great to see how nicely the laundry room came out.


Last week I traveled across the state to the west coast of Florida to install a project.
While there I got the opportunity to revisit a pair of vanities I had built and installed for the same client a month prior. It was wonderful to see the vanities in the completed bathrooms. I don’t often get the opportunity to do so. It was good to see them again and to see how nice they looked in the finished rooms.
The vanities are built from quarter-sawn white oak, both solid and veneer. The feet were hand-turned on my lathe. Inset doors with beaded trim.


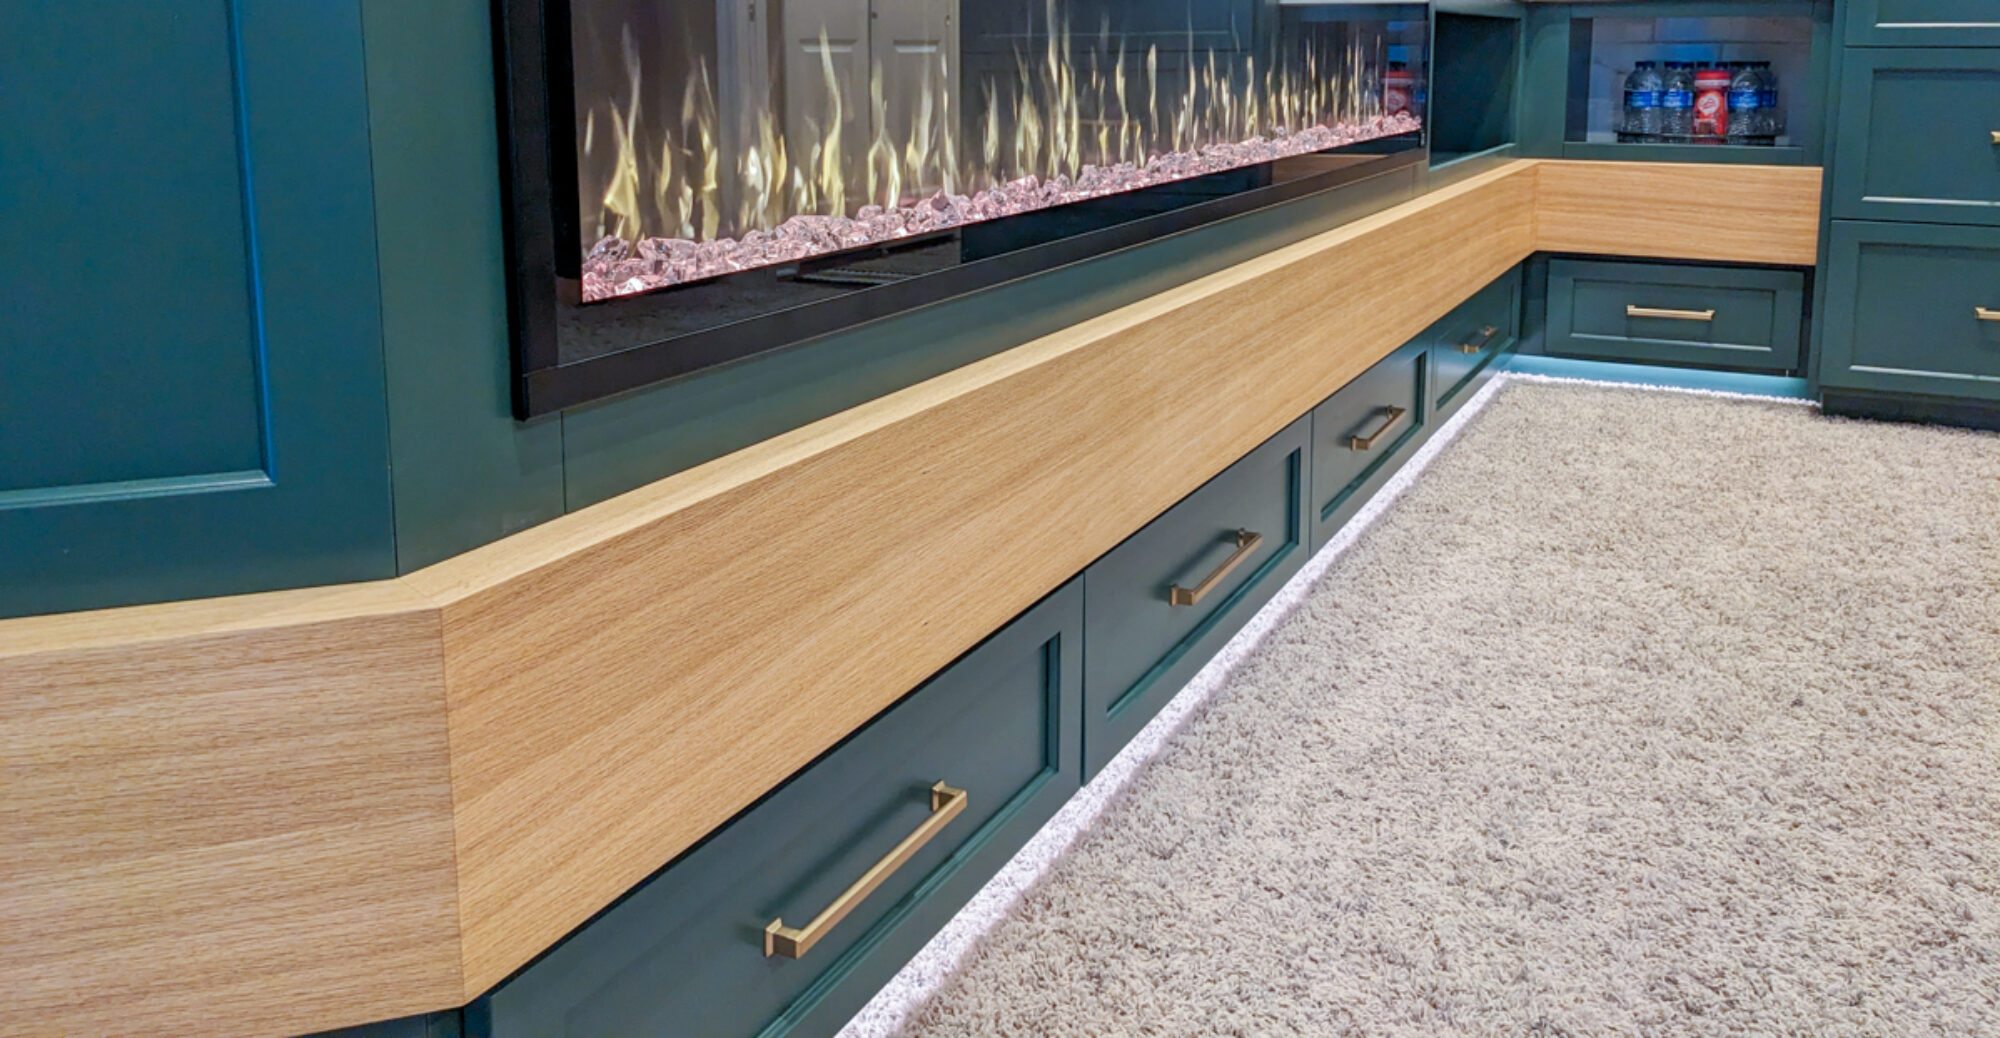
When I was still installing cabinets in new construction a number of years ago, I would often look at the niche openings that seemed to be in every living room and think to myself, “I wonder if someone could make a living building stuff to fill those holes?”
Well, here we are.
This TV area with lots of storage was custom built to fill a particularly large niche opening. The panel behind the TV was decorated with faux tin tile and I turned handles from some wood supplied by my customer that had sentimental value. I think the wood was cholla cactus, but I could be mistaken.
Lots of storage, lots of display area, a nice surround for the TV. A perfect transformation from what was just a large hole to a beautiful, functional piece.


I spend a lot of my spare time, you know, the hours between 3 am and 6 am, at the computer drawing up designs. These renderings are an important part of my process for a number of reasons.
First, it allows my client to see that I understand what they are looking for in the layout and design.
Secondly, it shows the piece in a virtual room drawn to reflect the actual room the piece will be installed.
Third, once drawn, changes and revisions are so much easier and cheaper to implement in the software compared to once the cutting starts in the workshop.
Fourth, the visual representation gives both myself and my client an idea as to how the various parts work together from both a practical and design view and how the proportions of each part relate to each other.
Lastly, it allows me to figure out the engineering behind the design. How, the parts will all fit together, what is possible given the limitations of my experience and the tools and equipment available to me, as well as which of those limits can be pushed.
That said, here are some renderings of projects I’ve built as well as some upcoming projects.


A large furniture store, no prizes for guessing which one, was having trouble keeping some inventory in stock due to Covid. While working on a project for a client, they asked if I could also build a cubby organizer and a desktop to their design. I really like the flowing curves and shape of the desk.


Pantry made with book-matched curly maple veneer. The countertops are figured walnut veneer.


This project started out as more and more of my projects do lately. My client sent me an inspiration image asking if I could build something similar. I replied yes and then set about figuring out how I was going to do it. A couple of revisions later we finalized the design and all that needed to be done was bring it into reality.
The vanities are six feet wide with no shortage of drawer space. They are made from quarter sawn white oak veneer and solid wood. The veneer pattern across the drawer fronts is “slip and spin” and the grain flows across the drawer fronts both horizontally and vertically. Miter joints on the cabinet stiles ensure the grain wraps around from the front to the side panels.
The drawer fronts have an integrated pull so the grain pattern is not interrupted with any metal pulls or knobs. The drawer guides are under-mount full extension soft close. The center drawer box is u-shaped to allow for the drain pipe and the two middle drawer boxes are reduced depth to allow room for the supply lines to the sink.
Last but not least, the cabinets are finished with a clear coat of Target Coatings waterborne conversion varnish with a flat sheen.


I delivered this bookcase last week. Built from quarter sawn white oak the design is a combination of two images my client sent to me.
The back of the bookcase is a shiplap. My first time doing shiplap and I really like the effect. I got the idea for the pulls a number of years ago and have been waiting for the opportunity to include them in a project.


