A custom full length mirror and hideaway ironing board cabinet built from rustic white oak veneer for a large walk in closet. The same veneer was used elsewhere in the house in other custom cabinetry projects.
It’s surprisingly difficult to take a picture of a mirror without including yourself in the photograph.
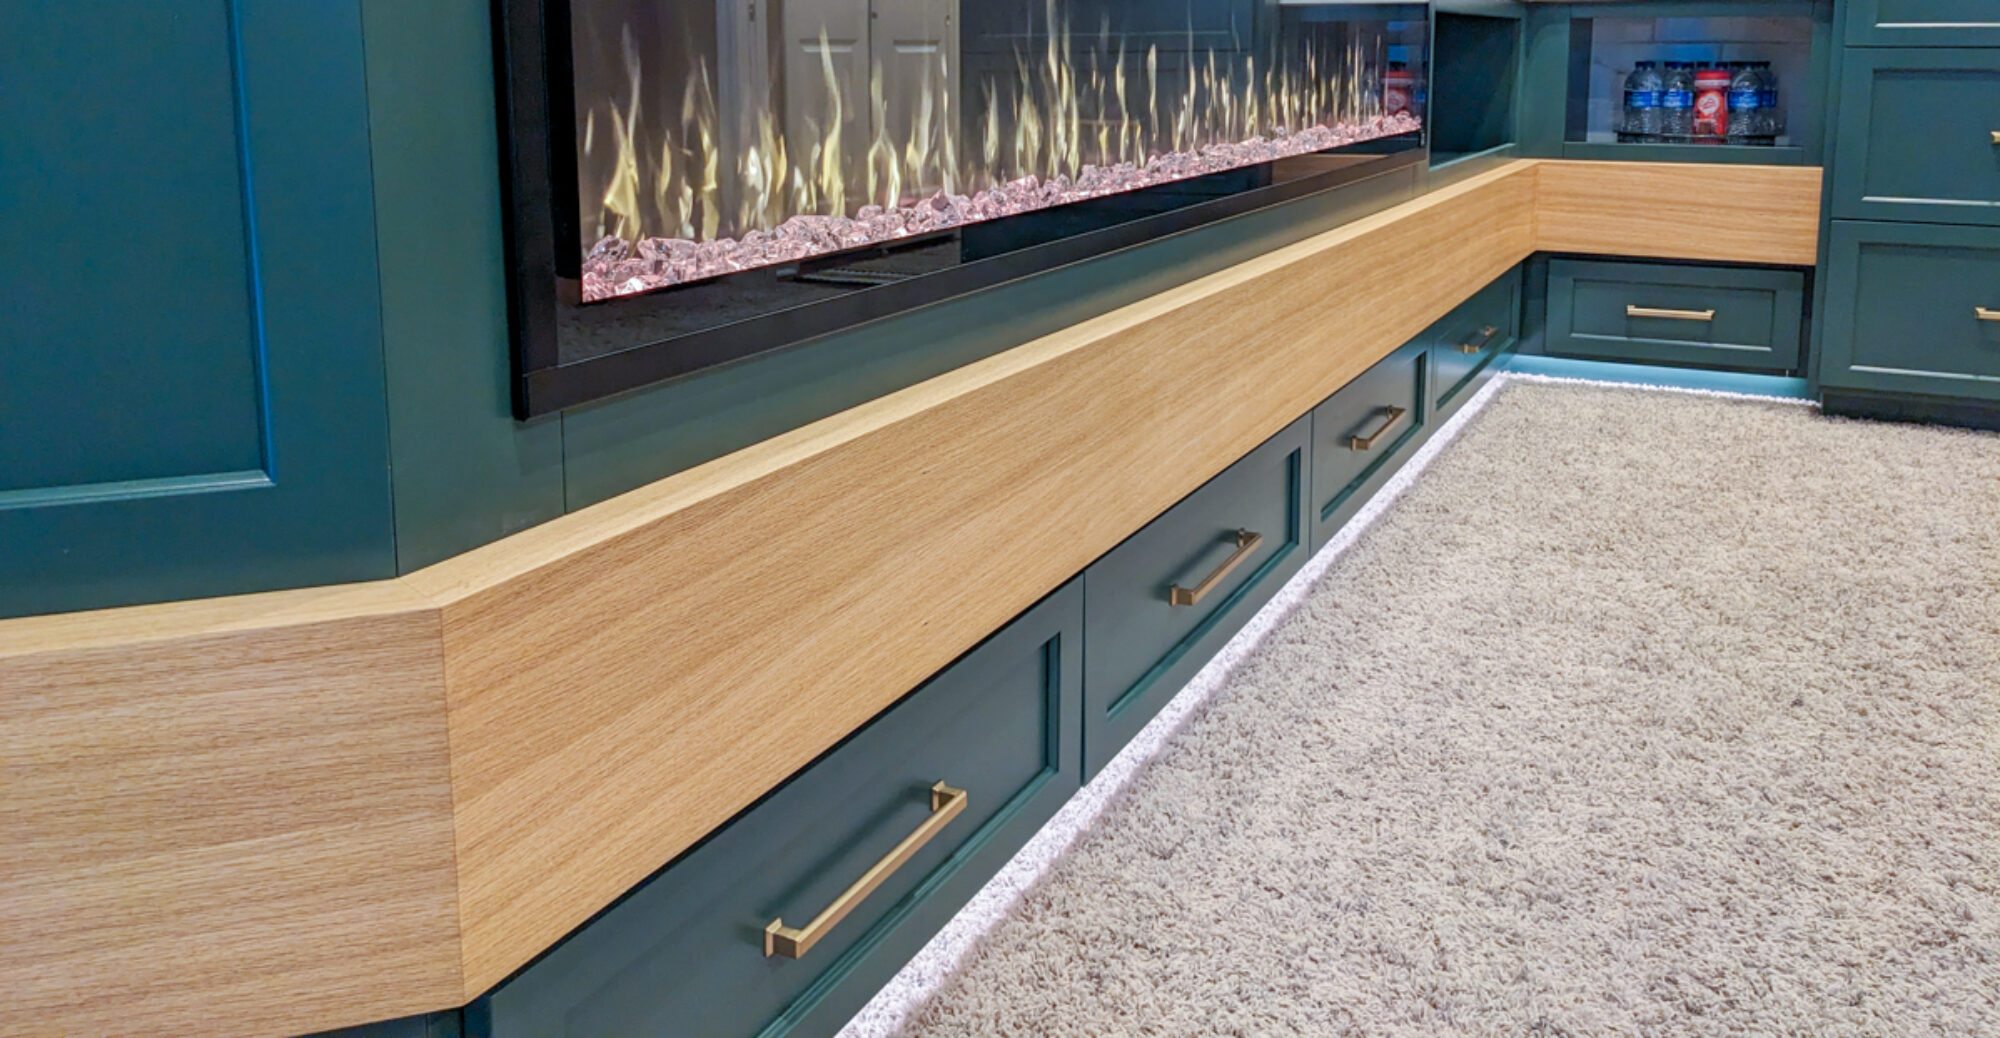
My clients fireplace mantle, made from pine stained a dark color, no longer complimented work being done on the other side of the room. Replacing the mantle could have damaged the shiplap and caused extra work with remedial repairs.
I suggested making a sleeve to fit over the existing mantle, changing the aesthetics without changing the overall size significantly. The sleeve was made from European white oak veneer, the same veneer being used as accent pieces in their kitchen facing the fireplace, visually tying the two areas together.
A simple and effective solution.
Before … pine wood with a dark stain.The “sleeve” sized to fit over the existing mantle.After … a lighter mantle of European white oak veneer.
Over the last year or so I’ve been involved with the complete remodel of a home. My clients were out of state and purchased a home here in Palm Coast, which they renovated before moving to Florida. I was hired to design, build, and install the cabinetry for the home.
The initial contract included the kitchen, master bathroom, guest bathroom, half bath, corner cabinets in the dining room, and closet. It expanded to include a fireplace surround, faux beams with tongue and groove ceiling, entrance columns, and furniture accessories like a full-length mirror and a fold-away iron board cabinet.
A recurring theme in the cabinetry was the use of rustic white oak veneer. The veneer was from some reclaimed barn wood, full of character, stories, and warmth.
It’s been a lot of work but well worth the effort. Pleased with the remodel and the cabinetry, my clients are settled in their new home, enjoying the Florida sunshine and beach.
There are too many images to include in one post, so I plan on posting the various projects over the next few weeks. First up is the guest bathroom built from rustic white oak veneer and stained navy blue.
A large, 13 feet wide by over 10 feet tall, feature wall for a private study built from white oak burl veneer. The cabinets include file drawers for both letter and legal. The floating shelves include LED lighting on both the top and bottom surfaces of the shelves.
This challenging project required a fair amount of engineering due to the floating cabinets and oversized floating shelves. Despite the challenges, it was an enjoyable project as my clients had a clear vision for the room and were very involved with the project’s design as it evolved from the initial concept to the final design.
For more details and pictures of the construction and installation of the project click here.
The white oak burl was wavy and brittle, so it needed to be softened with veneer conditioner and flattened before I could start work with it.Beautiful burl figureThe oversized floating shelves were hollow, both to reduce weight and to allow for the brackets to support them.Likewise for the countertops.The white oak burl being laminated to the hollow counters in the vacuum press.The floating shelf supports were built from aluminum profiles.Testing the floating shelf supports.Test fitting the hollow floating shelf on the aluminum profile supports.Looking good!Routing the drawer fronts so the pulls were flush with the top surface.Test fitting the drawer pulls.Supports for both legal and letter file hangers.Opening up the sheetrock to install the counter supports.A “disposable” cabinet was built to allow for accurate installation of the counter supports.A lot will be riding on these counter supports. They are well built and strong.Sheetrock repair after installing the counter supoorts.The counter supports were inserted in the hollow counter, suspending the cabinet which was then secured to the wall.Installing the floating shelves and LED lighting.Testing the LED lights.The white oak burl panels were added between the floating shelves. They were suspended on z-clips (aluminum French cleats).
It’s been some time since my last update as I’ve been focusing on building and installing the many projects I have scheduled. I will try and update the site over the next few weeks.
This was a kitchen remodel that transformed the room completely. The original cabinets were a dark espresso color. One of the biggest changes was how the lighter cabinets opened up the area. Despite increasing the upper cabinet height, the room felt like it had more space.
To the right of the refrigerator, a small pantry with wire shelving was converted to a coffee bar area with white oak floating shelves, LED lighting, and a shiplap background. The white oak and shiplap complimented the decor in the nearby living room.
In addition to increasing the height of the upper cabinet, the depth of the island was increased with the addition of cabinets in the seating area, adding much-needed storage space.
Other details included LED lighting for the countertops, above the upper cabinets, and inside the glass door cabinets. An appliance lift was added to the left of the range for a food mixer. To the right of the range, a spice pull-out was added.
This bedroom built-in filled an open niche providing a space for a TV along with a display area and extra storage space. The TV back panel, as well as the toekick, are made from white oak which complements the white cabinetry nicely. The LED lighting is inset vertically in the display cabinets allowing for the use of adjustable shelving while still illuminating the area. It is dimmable and controlled by a small touch switch inset in the bookcase stile.
I was pleased with how this built-in came together and, more importantly, so were my clients whom I’ve built a couple of projects for over the years.
This project involved building and installing some additional bathroom and kitchen cabinets as well as modifications to some of the existing kitchen cabinets.
In the bathroom, I added a wall-mounted tower with glass doors and shelves.
In the kitchen, I built a cabinet at the end of the island. The cabinet has a birch butcher block countertop, slide-outs on the left-hand side, and drawers with full-extension under-mount glides on the right side.
The modifications were to the cabinets on the back of the island. New doors were made to replace some glass doors and all the cabinets were painted white. Slide-outs were added to some of the cabinets and a new drawer box with docking drawer was added to one of the cabinets.
One of the challenges of this project was matching the profile of the existing cabinet doors. I ordered a custom knife for my molding machine to create the shape and the doors were made with miter joints instead of the customary cope and stick joint. My first time making miter joint cabinet doors and I was surprised with the extra work required. It was worth the effort as using a miter joint allows for some unique door profiles that are not achievable with the regular method of door construction.
Following on from my previous post. Among my friend’s lumber collection were half a dozen gorgeous old-growth cherry boards. His wife asked if I could use those to make a countertop for her fireside cabinets. The problem was the countertop was really big. Just over 18 feet long, 21″ deep, and 2 1/4″ thick, there was not enough of the cherry to make the countertop without getting creative.
The solution was to resaw the cherry down to 1/8″ thick and the resulting shop-made veneer yielded enough surface area for the entire countertop. Just enough! There was very little that was not used.
Cherry is such a beautiful wood and these boards were even more special than normal. One of the nice things about cherry is that it gets better looking over time, darkening and developing a rich patina over the years.